 |
I've maintained more than 4,000 square feet of perennial gardens, and two acres of ponds for weekly public tours more years than my joints care to remember. Between that and the nursery work, you can imagine that it would get pretty overwhelming, especially in Spring. So I have come up with a step-by-step recommendation to keep your maintenance nightmares to a minimum. If you follow these steps, you'll be amazed at how much easier your summer chores will be, how much healthier your plants are, and how few chemicals you use. I have a client who took my class many years ago, and has beautiful gardens all around her house. She's told me about her curious neighbors who come by every evening, and swear that she sneaks out in her gardens at night to weed. How else can she keep them looking so good?! I have a 40 minute video that shows you how to do these steps and also gives you many more gardening tips. Go to the Video page for information on how to purchase one for yourself.
 |
|
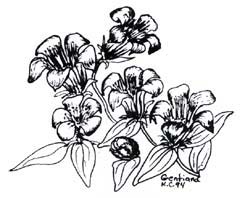
Gentiana
|
STEP
ONE – CLEANING
It is vitally important for perennials to be cut down and cleaned
out in the FALL (I have a list available of which perennials should be
cut down in fall), but if you did not get it done then Spring is
your time to really get squeaky clean. Spent plant material and tree leaves
left to decompose in the garden can create more insect problems and many
disease problems. Most plant diseases are soil-born. Gently rake out the
garden. Never step into your garden in early spring when the soil is still
very wet. You can do serious damage to the crowns of the plants, and it
compresses the garden soil too much, restricting the root growth.
STEP TWO – WEEDING
In upstate New York, where I am, it is best to wait until May or later
to actually get into the garden to weed. Use a sharp 'diamond hoe', 'swoe',
or hand tool, and CUT THE WEEDS AT GROUND LEVEL. NEVER PULL AND SHAKE!!
Weed seeds remain dormant in your garden soil for hundreds of years, just
waiting for you to come along and pull them up into the sunshine and rain!
Have you ever noticed that about two weeks after you weed your garden,
there's a nice fresh crop? Those nice cultivator tools do a masterful
job of bringing out all those little devils. Farmers cultivate their fields
to keep moisture in the soil, NOT to kill weeds. My video shows you exactly
how to do this. I know you're all going 'no way', cause you've been pulling
and shaking all these years, but trust me. See TIMELY
TIPS
for more info on weeds.
STEP
THREE – FERTILIZE
I know a lot of you are 'hooked' on liquid fertilizers, and in fact
so are your plants. Liquid (foliage feeding) fertilizers are not the best
way to go with perennials. They tend to create lush top growth without
doing much for the crowns and roots. The other problem is that we all
start out like Martha Stewart in the spring, fertilize regularly, then
we poop out. The plants will suffer a big sag if you don't keep the liquid
applications coming on a regular basis. I use only one kind of fertilizer
for perennials, Osmocote, one application lasts the entire season. It's
a slow-release fertilizer, and it gives the plants the strong roots they
need to survive the winter, and lots of flowers. Get a good commercial
rated version. Do not be fooled by the cheaper imitations on the market,
they don't own the patent, and they don't work as well.
 |
|
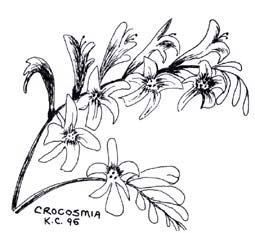
Crocosmia
|
STEP
FOUR – WATER
Avoid watering perennials with overhead sprinklers. This tends to
increase disease and fungus problems. They are not like house plants that
appreciate misting their leaves. Perennial's foliage should be kept dry
as possible. The best system to use is soaker hoses. It keeps the water
in the soil, and it conserves water by avoiding evaporation. Many don't
realize that every time a plant wilts it is putting stress on the entire
system, even though it may perk back up when you finally water. This can
weaken the plant so that it may not make it through the winter. The rule
of thumb for perennial gardens is one inch of water (rain) per week, shade
gardens need TWICE as much. So if you only get 1/2 inch, you need to water
to make up the difference. Measure and time your soaker to see how long
it takes. Get yourself a little rain gauge, because the weather news can
be very different from your exact area. Still stuck on that shade thing?
It's true, because the trees creating the shade are taking all the water
and nutrients first. See TIMELY
TIPS
for more info on watering.
STEP FIVE – MULCH
We mulch a perennial garden to help keep moisture in the soil, and
to keep the weed seeds from germinating. Using a composted material also
helps to enrich the soil and improve the texture as it works in each year.
NEVER EVER use wood products on perennials! Pine barks are not as bad
as shredded wood, but they're not great. As the wood decomposes, it depletes
the soil of nutrients (mostly nitrogen) which is what flowering plants
need the most. You only need to mulch 2-3 inches and never over the tops
of the crowns of the plants. Keep the mulch well away from the crowns.
Mulch with (in order of preference) 1) your own composted leaves 2) composted
manure 3) Cocoa shells 4) composted brewery products like Nutribrew.
See the Video Page for more information on the great video that covers these steps in detail.
Ask K.C. a gardening question at the Gardening Matters Bulletin Board
CLASS SCHEDULE by K.C. FAHY-HARVICK
Take a look at K.C.'s latest article: Why I feed the Birds
See also: The Four Seasons Garden - The Finger Lakes Gardener’s Challenge
Home | Bulletin Board | Cover
Story | Water
Lines | Bird
Gardens | Perennials
Garden
Design Services | Tools | Timely
Tips
K.C.
Fahy-Harvick
240 Sylvan Road
Rochester, NY 14618
kcfh60@gmail.com
Designed & Maintained by ScenicView Web Company ©2022